Showing posts with label Friends. Show all posts

Wednesday, February 8, 2017

FEBRUARY 2017 CTMH Workshops & Specials


Hello Friends~

Happy FEBRUARY!!!  Can't believe we are already a full week into February.  Unfortunately, I've been under the weather as we begin the new month.  Our bodies have a way of making us slow down and get the rest we need whether we want to or not.  I've been around so many people, co-workers, and patients who have one bug or another, and it eventually caught up to me.  It completely zapped my energy, not to mention any creativity I had in me...I would have loved to have 4 solid days creating artwork!  I'm on the mend now, energy is back, and I'm getting back in the groove of things.

I closed out January with a full house All Day Crop, thanks to everyone who participated and joined the fun!  I wish 12 hours of creative time didn't go by so fast!  We officially broke in the new bar area with lunch, dinner and of course happy hour! Hoping to have many more of these events in 2017.


Interested in knowing when your favorite papers from SE1 will be coming in the months ahead?  February is Sugar Rush, March will be Dreamin' Big, April will be Hello Lovely, and May will be Some Kinda Wonderful.  A few other events, such as Card Buffets are in the works too!

Feel free to share this blog post with your friends who LOVE to stamp, scrapbook and paper-craft.  I always appreciate your referrals...and I'm happy to reward YOU too!  Thank you from the bottom of my heart for your continued friendship and support...I do appreciate YOU!

Helping you preserve the memories that matter most~
Julie

INSIDE THIS ISSUE:
1) Sugar Rush 12-Card Workshop
2) SUGAR RUSH Workshop Your Way = (3) 2-page layouts + 9 cards
3) FEBRUARY Promotion - SIGN ME UP!
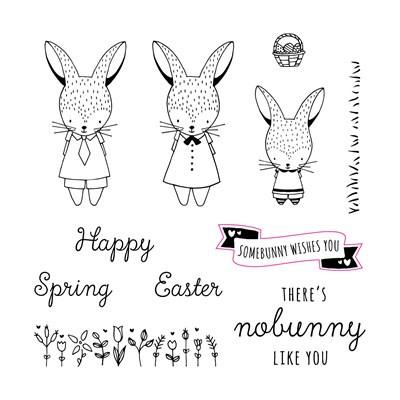
4) February Stamp of the Month - #S1702 Easter Bunny
5) Celebrating 17 years with CTMH in February!
6) Card Buffet COMING SOON!


1) Sugar Rush 12-Card Workshop -create 3 each of the 4 designs
Who doesn't need fun, festive birthday cards to send out to friends and family?  Get your stock pile started with this 12 card workshop using the Sugar Rush Cardmaking Thin Cuts Bundle which also includes the stamp set!  (click on image to enlarge)


WHEN: (Choose Your Day) Fri, Feb17 (9am-noon) OR (6-9pm), Sat, Feb18 (9am-noon), Tues, Feb21 (9am-noon)
WHERE: Julie's StampNScrap Studio
RSVP by Sunday, February 12th at 6pm with order and payment
CLASS FEE: $12 for card kit + add-ons 

CARD KIT includes: 1/2 pk Sugar Rush (X7215B), 12 White Cards & Envelopes (X254), 2 sheets cardstock (1-Tangerine, 1-White Daisy)

ADD-ON supplies also needed for cards - (purchase or bring from your personal stash)
Z3310 Sugar Rush Dots
Z3311 Sugar Rush Washi Tape
Z3300 Sugar Rush Cardmaking Thin Cuts Bundle - optional (if you're even considering these, I encourage you to purchase these now, as the Thin Cuts have a history of selling out quick!  I know you'll want these after making the cards, so be prepared and have them available for your personal use).  The THIN CUTS BUNDLE also includes C1671 Sugar Rush-Cardmaking stamp set.

MUST BRING TO PARTICIPATE: 12" paper trimmer, adhesives (tape runner, 3D foam tape), scissors, paper piercing tool, add-on products from your stash, VersaMat (optional, highly recommended), BLOCKS: 1x1, 2x2, 1x3.5, INKS: SeaGlass, Tangerine, Pomegranate

2) Sugar Rush WYW - (3) 2-page layouts PLUS 9 cards (3 each of 3 designs)
Celebrate your sweet loves - sweet treats, furry friends, hubby, ice cream and more!
(click on images to enlarge)


WHEN: (Choose Your Day): Wed, Feb22 (9am-1pm); Sat, Feb25 (9am-1pm); Tues, Feb28 (9am-1pm)
WHERE:  Julie's StampNScrap Studio
RSVP by Tuesday, February 14th with order and payment
CLASS FEE: Sugar Rush WYW Kit = #G1118, $26.95*

*Layouts use additional cardstock (1-Pomegranate, 1-Tangerine, 1-SeaGlass, 1-Whisper for photo mats), you may purchase individual sheets from me for $.70/sht, or purchase the Sugar Rush coordinating cardstock pack listed with Add-Ons below.

Add-Ons include: 
X7215D Sugar Rush Coordinating Cardstock (includes 3 sheets each of Pomegranate, Tangerine, SeaGlass and Whisper)

MUST BRING TO PARTICIPATE: 12" trimmer, adhesives (tape runner with refills, 3D foam tape), scissors, paper piercing tool, VersaMat (optional, highly recommended), Memory Protectors (optional-to protect your completed layouts).  FOR CARDS, you'll also need: (9) White Cards & Envelopes, INKS: Pomegranate, SeaGlass

3) February Promotion - SIGN ME UP!!!
 
The CTMH Consultant Opportunity Awaits...
If you've ever considered signing up as a CTMH Consultant, now is a great time to finally do it!  When you sign up, you get the following:
  • New Consultant Kit full of products valued over $200
  • $50 in Select Product Credit
  • 22% commission on additional product purchases and sales
  • Flexibility to earn extra income while working your own hours
  • PLUS, if you sign up in February 2017, you will also receive the February, March and April Stamp of the Month sets FREE - an additional $53.85 in retail value!
Former CTMH Consultants...
As a special offer his month, you can choose a no-kit option that will let you become a Consultant again without paying for another New Consultant Kit!  Sign up for just $50 and you'll still receive the $50 in Select Product Credit PLUS the 3 Stamp of the Month sets - it's an unbeatable opportunity to come back and get a fresh start with Close To My Heart.
*Free Stamp of the Month sets offer and no-kit sign-up offer valid February 1-February 28, 2017 only.
I will also be posting a Facebook LIVE event video under the Monthly Specials TAB above.

4) FEBRUARY Stamp of the Month - #S1702 - Easter Bunny (set of 12)
product image
BEAUTIFUL STAMPS, AMAZING DISCOUNTS!  Each month you can purchase a new D-size stamp set, available for one month only, for just $5 - when you place an order of $50 or more in CTMH products!  That's a savings of over 70% retail, OR simply purchase this set for only $17.95 without a qualifying order, only during the month of February 2017.


5) Celebrating 17 years with CTMH in February!  I want to send out a very sincere and heartfelt message of gratitude to YOU for 17 fabulous years of friendships, preserving memories, card-making and paper-crafting.  We've shared lots of stories and lots of laughs over the years.  We've come a LONG way, baby!  I know many of you remember the days of me hosting workshops in our garage, then in the barn, and now in my finished studio. Even our artwork has advanced - as I'm purging through 16 years of completed artwork - I'm seeing the evolution of how far we have come over time.  Thanks for sticking with me...I wouldn't be doing this without you!  Many of my closest and dearest friendships are because of CTMH, and that includes YOU!!!  CHEERS to another 17 years!!!

6) Card Buffets COMING SOON!!!  Some time ago, I mentioned wanting to incorporate Card Buffet Workshops into my calendar of events.  That time is right around the corner!   Here's how it works:  Come make all the cards you can in 2 hours for just $15!   You bring your own adhesives (tape runners, 3D foam tape, glue dots, etc) and a Basic Tool Kit including scissors, paper piercing tool, bone folder, VersaMat, stamp scrubber & spritz, etc.  All other supplies for cards are provided and pre-cut of you!  You get to use my ink pads and blocks (or bring your own blocks for personal use - make sure your blocks are clearly labeled with your initials if you do!)  I'm planning to start hosting this event at least once a  month - with new cards into the rotation each month.  

Yes...there are rules you MUST follow - each card must be completed before you move on to the next card, you cannot take cards home to complete, you must care for my products as if they were your own. COME JOIN THE FUN!  Watch my blog and my Facebook business page for the announcement and date!

Julie Nilsson, Independent CTMH Consultant
Close To My Heart Scrapbooking/Stamping/PaperCrafting
Faster, Simpler and Easier
Shop Online: www.julieann.closetomyheart.com


Wednesday, August 28, 2013

Thoughts from the Heart

Do you enjoy scrapbooking or cardmaking more?  I'm not sure I could give you a definitive answer to that question.  I enjoy it all!  Most importantly, I think I enjoy the "people" that I create with.  I love the friendships that I have developed because of Close To My Heart.  I have friends all over the country that I wouldn't have otherwise met.

I'm beginning the workshops from the Autumn/Winter 2013 Idea Book with the Laughing Lola Cardmaking WOTG kit.  These cards the perfect "pick me up" for a friend.


The cardmaking kit includes the papers (both cardstock and B&T Duo papers), kit-exclusive accessories, cards with envelopes and instructions to create 15 beautiful cards (5 each of 3 designs) inspired by our own Jeanette Lynton.  Even if you're unable to attend the live event, you can create this workshop on your own time with the full color step-by-step instruction guide...order yours today.   This is my therapy!


Monday, August 26, 2013

we all SCREAM for ICE CREAM layout

I love super FUN mail days!  
Recently, I received this amazing layout from my 2nd upline and friend, Michelle Snyder, 
for reaching a sales goal in June 2013.  
Did you realize that during the month of July (specifically July 21st this year), there is a National Ice Cream Day?  How did I not know this?!?!  Well...until now! Oh, how I enjoy ice cream...of all flavors!  

(click on image for more detail)

This layout is so bright and cheerful...I love the vibrant colors (Lagoon, Smoothie, Sunset, Pear and Cream Brulee), and the use of the Silver Shimmer Trim to add some glam.  Michelle also used the Chalk Marker to add highlights to the "Ice Cream" title and the waffle appearance in the ice cream cone.  Brilliant!  The scoops of ice cream and the white background behind the title comes from the Artiste Cricut cartridge (pg36, Accent 3, <6>, cut at 2-1/2" and 4-3/4" respectively). How creative!  She also used the Pixie Glitter Alphabet as part of the title, and used the font from Artiste for "Ice Cream".  I am always inspired by Michelle's artwork!  Thank you, Michelle!  I can't wait to add photos to this layout.


Thursday, November 22, 2012

Happy Thanksgiving!

I found this card fitting to share with you today.  The card uses the Flirty papers, and Casual Expressions stamp set, the card design is from Originals, page 91, Puzzle Background.


As we gather together with family and friends on this Thanksgiving holiday, I want to express my gratitude to all of you who, because of CTMH, have become close friends and like family to me.  I cherish the friendships this wonderful company has brought into my life, and without you, I wouldn't be doing the business that I love.  Thank you for your continued support!
Happy Thanksgiving~
Julie

Monday, November 19, 2012

I love FUN MAIL days!

It's not everyday that you open your mailbox and find a hand-stamped card from a friend (Thanks, Shari!).  It's one way to surely brighten someone's day!

The stamp set used is Fall Favorites (S1209), which was September's Stamp of the Month, and currently not available...but I bet it will be featured again soon in a near future catalog.  So if you didn't get it in September, it might just come around again!  The paper, Florentine, is still available and I find it's perfect for autumn cards.  

I know so many of us tend to hoard our papers (myself included), and you may or may not realize that papers really do get dated over time.  In the years I've been with CTMH, we've gone from one sided light-weight monochromatic B&T papers, to today's beautiful double sided cardstock-weight B&T papers in a variety of colors and patterns, with a zip strip border (how can we improve upon that? lol).  Over the last couple of years, my friend Shari has ingrained in my brain "use what you have"...so when you find you have scraps of paper you just can't toss, in this modern day of high-tech, create artwork from your heart to share with a friend!  I bet it will brighten your day too.

Thursday, October 11, 2012

Monogram & Perfect Fit = Tutorial

I've seen so many ideas floating around on social media using the Perfect Fit - Frames stamp set...it's one of my VERY used stamp sets of late.  I love this stamp set...it's just so versatile!

One day, I found this 3x3 card & tote idea on Pinterest (anyone else addicted?), and unfortunately I didn't pin it (what was I thinking???, obviously I studied it enough to re-create it)...and now I can't find the original pin to give credit.  I thought this project would be a good one to do a picture tutorial for...here's the finished project:


 STEP 1: Take a piece of cardstock, 8" x 7-1/4", on the 8"side, score at 2" and 4".  On the 7-1/4" side, score at 2", then flip the cardstock over and score at 2" again.  It should look like this:


STEP 2: Next, measure down 2"and mark the left and right edge of the cardstock.  Make a diagonal cut from your mark to the score line as shown below:


 STEP 3: Cut the middle section to the first score line on both sides as shown:


STEP 4: Adhere piece of patterned paper measuring 1-3/4" by 3"to the lower middle section, centered between the score lines, leaving a border, as shown:


STEP 5:  Cut 2 pieces of patterned pieces measuring 1-3/4" x 3-3/4".  Next, measure down 1-3/4" and mark the left side of one piece, and the right side of the second piece.  Again, make a diagonal cut from your pencil mark to the opposite corner, as shown on each piece.  These will be the sides of your box.


STEP 6: Adhere the two side pieces, centered between the score lines, leaving a border as shown:


STEP 7:  Next, flip your project over, and add a strong adhesive (I used a sticky strip) to the areas shown:


STEP 8:  Carefully, bring up the center pieces on each side, and wrap the bottom pieces around to create a portion of the box as shown:


STEP 9:  Next, bring the sides of the box to meet the bottom portion of the box, adhering the sticky strip as shown:


 STEP 10:  The box is almost finished!  Make sure all your adhesive is stuck well...I usually take my bone folder and press firmly where I have placed my adhesive.


 STEP 11:  Next, I measured about 3/8"-1/2" from top of box, and centered from left to right, using an oval punch, I created a "handle" for the box:


STEP 12:  Create 3x3 cards to fit inside your box.  Any design will work!  My cards use the Clementine papers, and I used the Perfect Fit - Frames and the personalized Monogram stamps, each letter of the alphabet is sold separately...just $2.95 per letter.  Did I mention that all 4 images on the Perfect Fit - Frames stamp set coordinates with the Art Philosophy Cricut Cartridge?  They do!  How's that for fast, simple and easy!  Just cut the shape on the Cricut, and stamp!

Shhh...I'm giving these to some good friends this weekend as little goodies at our scrapbook retreat!  I sure hope they like them.

I hope I have inspired you to create a project like this...and if you do, please leave a link so I can see what you made.  If you have any questions, please post a comment below, and I will do my best to clarify.  If you enjoyed this picture tutorial, and would like to see more of these, please leave a comment.  I would love any feedback.  Thanks!


Tuesday, May 22, 2012

A BIG Surprise!

Ever have one of those weeks when you're just feeling out of sorts?  Feeling down...and just not yourself?  I recently had one of those weeks.  Then, out of no where, a cheerful bouquet of flowers was delivered...and all was ok with the world again.  I love an unexpected delivery, and where I live flowers don't make it to my doorstep easily!

My good friend, Shari (Hi Shari!), asked me one day in an email, if I was going to be around that day.  Nothing out of the blue, really.  I replied "Sure...are you going to swing by?" And with that comment, started this story I'm about to share. Now granted, she lives 600 miles away...

To make a long story short, we messaged back and forth most of the afternoon.  I knew she was planting flowers in her yard, then off to run errands. She was texting from her phone, joking that she was only an hour away from my house, wondered what was I working on, and what I was going to fix her for dinner, etc. I told her "the party" was down in my studio, just come on down when she got here (LOL)...she said she was going to ring the doorbell, so my dogs wouldn't attack her.  I was making her birthday gift (that's going to be another blog post) that afternoon, so I was downstairs creating in my studio anyways.  We joked back an forth some more, a few hours had passed...then all of a sudden...THE DOORBELL RANG!  Now, where I live, we don't get people ringing the doorbell often.  I have to say, for a split second, I thought...could that really be Shari?  Did she really drive here?  I about tripped up the stairs, dying to see who was at my door.  When I opened it, I had a gentleman with a bouquet of flowers standing there.  I thought FOR SURE he had the wrong house, but he confirmed the flowers were for me!
The card read "Hope this brightens your day!" 

When I collected myself from the shock...I immediately called Shari (via iChat)...we had a good laugh as I told her my end of the story, thinking that it might really be HER ringing my doorbell, and me tripping up the stairs, as I hurried to see who was at my door.  She wished the dogs (or the man with the bouquet) could have taken a picture of my face when the doorbell rang.
So later that evening, I go to my mailbox, only to find a card from Shari too - the card put a smile on my face, and the handwritten sentiment on the inside brought happy tears to my eyes!  What a day!  Friends REALLY do make the world a better place!
The card alone would have brought me out of my funk, but the flowers...now that was over the top!  Thank you Shari...you made me laugh and cry in the same day! I'm so thankful for CTMH bringing us together and I cherish our friendship!


Saturday, May 12, 2012

Flip Flap Layout - Road Trip!

A couple weeks ago, a few friends and I took a road trip to see a friend in South Dakota (see Road Trip post), and I already have my pictures scrapbooked...I can't believe it!  I think what really helped, was that I made a two page layout for each of them as a special gift to remember the trip (and it forced me to take "people" pictures too!)  Here's the layout I created:

Now, here it is with pictures:
I had several pictures that I wanted to include in this layout, do you find yourself in this same dilemma? I have just the answer...it's FLIP FLAPS!  No, not flip flops...flip flaps!  They are pockets that you can slide photos into and attach the Flip Flap to your layout with its adhesive strip!  
See, I used them on the horizontal pictures above...so I fit five 4x6 photos in that one space (using 2 flip flaps stacked).
And another on the vertical picture on the right page above...fitting three 4x6 photos in that space.

Flip flaps have another great use...you can add "hidden" journaling to your pages.  I plan to add a flip flap on the vertical picture on the left page, and create my journaling under the picture.  I need to create a second 2-page layout for the postcards we purchased at Mount Rushmore, and I'll probably use more Flip Flaps on those pages too!

Next time you have too many pictures for a 2-page layout...remember Flip Flaps! They come in 3 sizes:  6" square, 12" assortment, and 4x6 (used here).

FYI - this layout uses Cruisin' paper, the Love Life stamp set, and the Cocktail Alphabet.  As I see the names of these products listed together...it describes our weekend to a tee!  What happens in S. Dakota stays in S. Dakota! LOL

If you like the Cruisin' papers, I'm planning the Cruisin' WOTG kit in July...watch for it!

Friday, May 4, 2012

Road Trip!

It's been a whirl wind for the last couple of weeks...I don't know if I'm coming or going. Actually last week, a few friends and I took a quick road trip to see a friend living in Rapid City, South Dakota...and what fun we had!

We had to stop for each state line and get a picture...wish we were in these too...didn't think of it until after the fact.

We were stuffed to the gills...and this was packing light! I taught 4 different workshops while we were visiting, and of course we saved time for sight-seeing and shopping too!

It was challenging to work in a chance to see Mt. Rushmore...Mother Nature wasn't cooperating! The weather was overcast, rainy and foggy...but we managed to get a clear moment, wind and all. Afterwards, we walked to the gift shop, and when we came out, it was snowing! Our timing couldn't have been any better!

The GPS took us home a different route, so we added another state line picture:

Home, Sweet Home!