Showing posts with label Holidays. Show all posts

Wednesday, January 22, 2014

A Groovy Kind of Love Layout

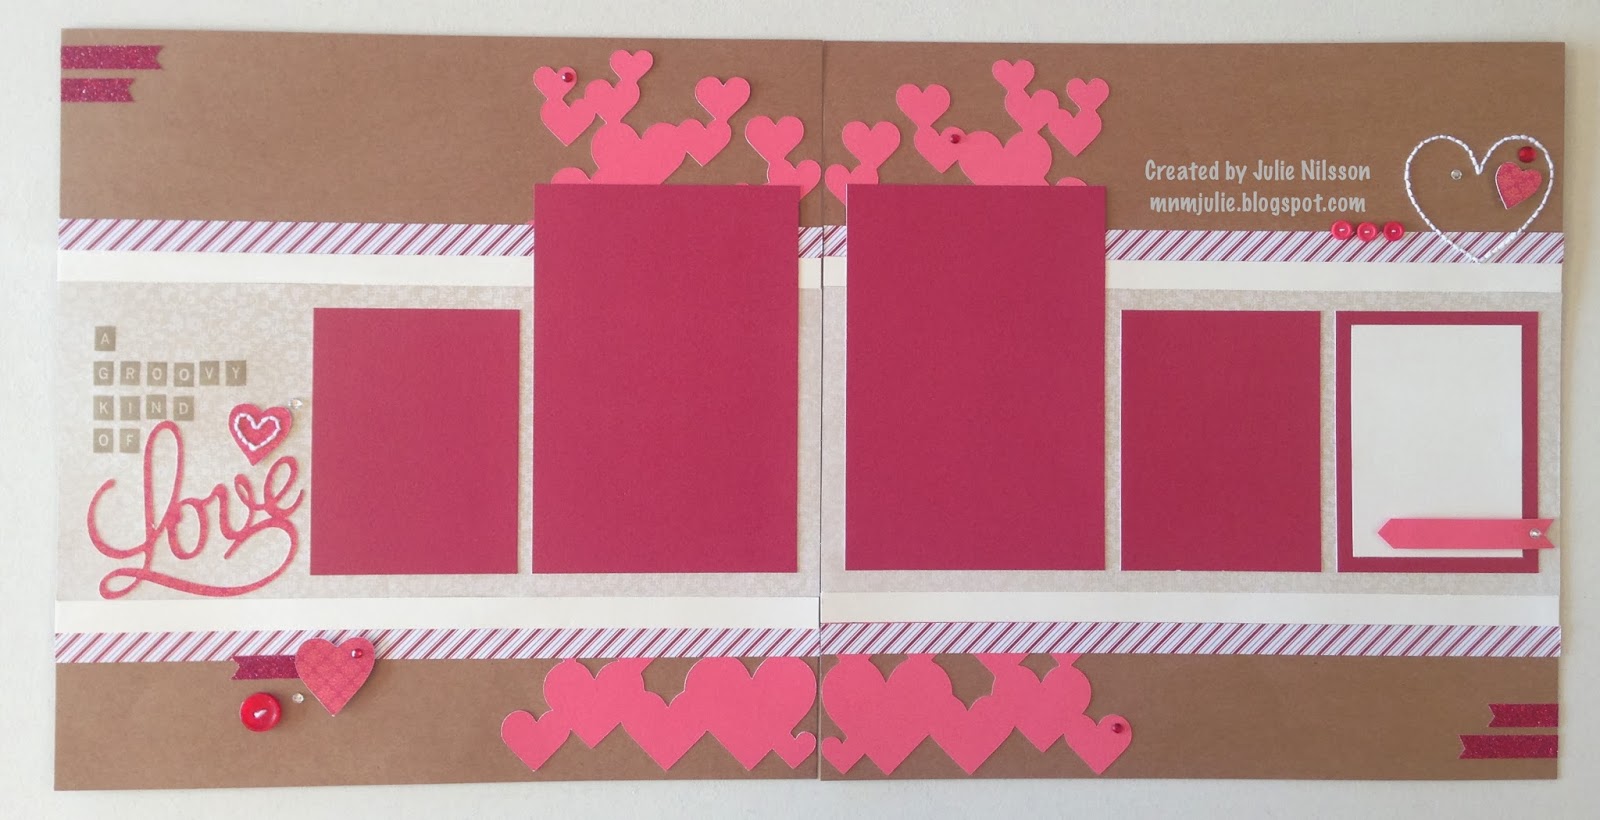
I recently hosted an All Day Crop for my gals and included supplies for a two-page layout in their registration fee.  Valentine's Day is right around the corner, so I created a "LOVE" layout, however, it's generic enough to use for just about any occasion, not just Valentine's Day.  
The layout is Pattern 02 from Make It From Your Heart, Volume 2.  I used Kraft cardstock as the bases for the layout.  I also used a combination of retired B&T papers, Sparkle & Shine, Bliss, and Stella.  Love how all these very different papers come together so nicely.  I rarely create a project without using one or more of the CTMH Cricut cartridges, 
this one is no exception.    


I used the Artbooking cartridge to cut the heart overlay, and the title word "Love".
Heart Overlay - pg48, Overlay, <q>, cut at 11.5" (RealDialSize-RDS)
"Love" - pg61, Title, <f>, cut at 3" (RDS)
Art Philosophy was used to cut hearts too - pg26, shift <Heart1>, cut at 3/4", 1" and 1.25"

 I used Keyboard Alphabet in Desert Sand ink to stamp out the title of the layout.  
The Stitch Guide and Foam Mat came in handy as I pierced the heart shape onto the cardstock and stitched using white Bakers Twine.  The layout also used several coordinating embellishments to accent the pages.  Clear Sparkles, Red Sparkles, buttons, and Red Shimmer Trim

Thursday, November 14, 2013

Sparkle & Shine Gift Tags

This project was created and designed by fellow consultant, Tammy Rusch, for our group swap.  Tammy created a set of gift tags...perfect for those presents under the tree 
or as a handmade gift for a friend.

The packaging that holds all 12 tags is created by using the Sparkle & Shine paper packet, and the Sparkle & Shine WOTG stamp set.

The "Merry and Bright" is on a band that wraps around the gift tag folder, 
it slides off to unveil the tags inside.  Start with an 8-1/2" x 10-3/4" piece of patterned paper or cardstock.  Score paper on 10-3/4" side at 1/2" 3-1/2", 4", 7, 7-1/2, and 10-1/2". Turn paper 90 degrees and score on the 8-1/2" side at 1-1/2" and 6".  Fold to create pockets on long side.  
Use adhesive of choice to seal on the 1/2" sections of the pocket.  
Fold into rectangular box, and secure with band of paper of choice. 

Inside, the tags are stamped using the stamp set from the Season's Tweetings Gift Bag kit.

Great job on your Gift Tag set, Tammy!  Love them!

Tuesday, October 15, 2013

Holidays from the Heart HOLIDAY GIFT GUIDE

TODAY is a SPECIAL DAY!

The beginning of the Holidays from the Heart Gift Guide campaign!  


Choose a FREE holiday product with your qualifying order...
From now until December 31st, when you place an order of $100 or more in retail-priced products, you qualify for one free "star" item from the Holidays from the Heart Gift Guide.  
You'll love the sparkle, and the savings!

Place your order online from my website and have it shipped directly to your door, 
(JOIN the Holiday Gift Guide open party and have a chance to win FREE product) 
or contact me and I'm happy to place your order for you!

Love the artwork? 
The online recipes show what products were used to create all the fabulous artwork inside!

Thursday, November 22, 2012

Happy Thanksgiving!

I found this card fitting to share with you today.  The card uses the Flirty papers, and Casual Expressions stamp set, the card design is from Originals, page 91, Puzzle Background.


As we gather together with family and friends on this Thanksgiving holiday, I want to express my gratitude to all of you who, because of CTMH, have become close friends and like family to me.  I cherish the friendships this wonderful company has brought into my life, and without you, I wouldn't be doing the business that I love.  Thank you for your continued support!
Happy Thanksgiving~
Julie

Wednesday, October 31, 2012

Happy Halloween!

Happy Halloween!!!
...to all the ghouls and goblins in blogger land!

I don't do much of the "scary" halloween, I'm more of a "cutesy" halloween creator.  
These cards below show more of my style: 

Yes...I'm still using the Perfect Fit - Frames stamp set (I just can't get enough of it...definitely getting my money's worth!)  The B&T paper (patterned) comes from the Spellbound kit.  The Slate cardstock on the front of the card, was scored, then sanded, highlighting the white core of our papers (I love that about our papers!).  I also wrapped the Black Tulle Ribbon around the B&T paper on the front of the cards, tied into a knot.  The scallop circle and the matted circle were POPPED using 3-D foam tape to give some additional dimension to the cards:
 The other stamp set I used was Perfect Fit- Halloween for the sentiments, and pumpkin.
 

Have a fun and safe Halloween night!  

Monday, October 29, 2012

BOO Banner

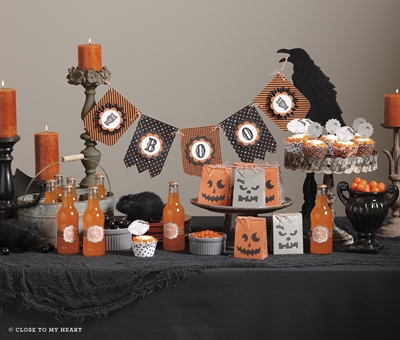
Halloween is just about here...so I thought I would show off my "BOO" banner that I have hanging above my fireplace in my studio, before I pack it away until next year. 

I absolutely fell in love with the Spellbound Cricut kit.  The WOTG kit creates a Halloween party for 8 including treat bags, cupcake picks and liners, soda wraps and this banner.  


If you're one to throw a Halloween party, you just might want to consider this kit for next year, 
but purchase it now...as it won't be carried over to the next catalog. 
You'll be sure to impress your guests!!

The papers are so much fun, and only available in this kit...perfect for Halloween!  
I'll show you some more artwork Wednesday.

Sunday, October 28, 2012

Studio J = Tricks and Treats

Time is running out, if you haven't taken advantage of the Studio J special in October!  

Check out the "Monthly Specials" tab in the menu bar above to get all the details on how you can get a free Studio J layout with your Studio J purchase.

Watch this "Love Your Layout" video, and learn some new tricks in Studio J as you treat yourself to the ultimate online creative experience.  
You'll learn how to apply photo filters, create ruffled ribbons and more!


Now, log onto Studio J, and create your own layout! 
Warning: Studio J is highly addictive, SO much fun, and without all the mess or supplies needed to create beautiful layouts.  It's all online!  Try it...I think you'll love it as much as I do!

And don't miss out on your opportunity to save $$$ in October (special ends October 31, 2012) with your Studio J purchase!


Friday, October 26, 2012

Christmas Cards - Pear & Partridge Cardmaking WOTG

The weather has suddenly turned cold and it's snowing in Colorado...so it's a perfect time to start thinking about those hand-made holiday cards.  Do you send out hand-made cards for the holidays?  
If so, I've got you covered...Close To My Heart has a workshop kit 
designed especially for Christmas cards!  

I hosted this workshop several times in October...but if you missed it, you can create 15 cards (5 each of 3 designs) on your own...just order the Pear & Partridge WOTG for Cardmaking kit.  Each workshop kit comes with an exclusive stamp set, ribbon, red sparkly glitter gems, cardstock and patterned papers, card bases with envelopes, and an instructional brochure, complete with cutting diagram and step-by-step directions to putting your cards together.  

(click on image to enlarge)

If you send out more than 15 Christmas cards, don't worry...contact me, and I can hook you up with additional supplies to complete more cards, without purchasing another entire kit.  
Many of my guests who attended this workshop did just that!
HURRY...this card-making workshop kit will retire after this holiday season 
and will not carry over to the next catalog.  

Wednesday, October 10, 2012

October Workshop - "Moonlight"

With Halloween right around the corner, I planned to help my gals get a head start on the photos they'll be taking of their little trick-or-treaters.  Earlier this month, I hosted the Moonlight Workshop-on-the-Go kit.  We made these two 2-page layouts:

(click on images to enlarge to show greater detail)
Each Workshop-on-the-Go kit comes with a full color instructional brochure, so it's easy to create the workshop on your own.

I love the colors in the Moonlight paper pack...fall colors have always been my favorite.  But I wanted to share with you to "think outside the box".  These papers are more than just for fall or Halloween.  One of my team members (Hi Bertha!) created a beautiful CHRISTMAS card using these papers...that's right, Christmas!
Bertha's card uses the October Stamp of the Month, Very Merry Christmas.  She dyed the Color-Ready Seam Binding Ribbon with Smokey Plum ink, and added a Rhinestone Designer Brad and the Silver Shimmer Trim for additional bling.  The pattern on the Slate cardstock was created using an image from a Halloween stamp set, All Hallows Eve.  Bertha used the Metallic Markers (silver) in the center of each of the stamped images.  Great job on this card Bertha!  I've had so many compliments, giving you full credit, of course!


Saturday, September 29, 2012

Saturday YouTube Video - Spellbound Halloween Party

If you host Halloween parties - I have the perfect kit for all of your party favors, including treat bags, cupcake liners, soda wraps and a BOO banner...it's the Spellbound Workshop on the Go kit.  This Cricut kit gives you most everything you need to create a ghoulish Halloween party for 8 guests...even including exclusive papers and a coordinating stamp set too!  The cute Spellbound paper packet is available only in this kit.

Sorry...I'm not hosting this particular kit in my workshop schedule, but with the instructional brochure included in the kit, I have no doubt you can assemble this kit on your own.  You'll need to set aside about 6 hours and you'll need the new CTMH Artiste Cricut cartridge to complete this kit.

Watch as Kristine shares with you the Spellbound Halloween workshop:
(This kit can be found on page 14 of the Autumn/Winter Idea Book.)

Contact me, or shop my website to get your Spellbound Halloween kit today!  


Tuesday, June 19, 2012

Star Spangled Layout

I hosted an All Day Crop last week, and I always provide a project for them (not that they don't have enough to work on! LOL) to create during the crop.  This time, it was a 2 page layout just in time for July 4th celebrations!
The layout design is Monologue (pg.52-53) from Imagine.  I used SuperHero paper and the American Celebration stamp set.  I love how patriotic it looks!

Now all they have to do is take pictures and put them on their layout, and their memories will last a lifetime!