Showing posts with label Sparkle & Shine. Show all posts

Wednesday, January 22, 2014

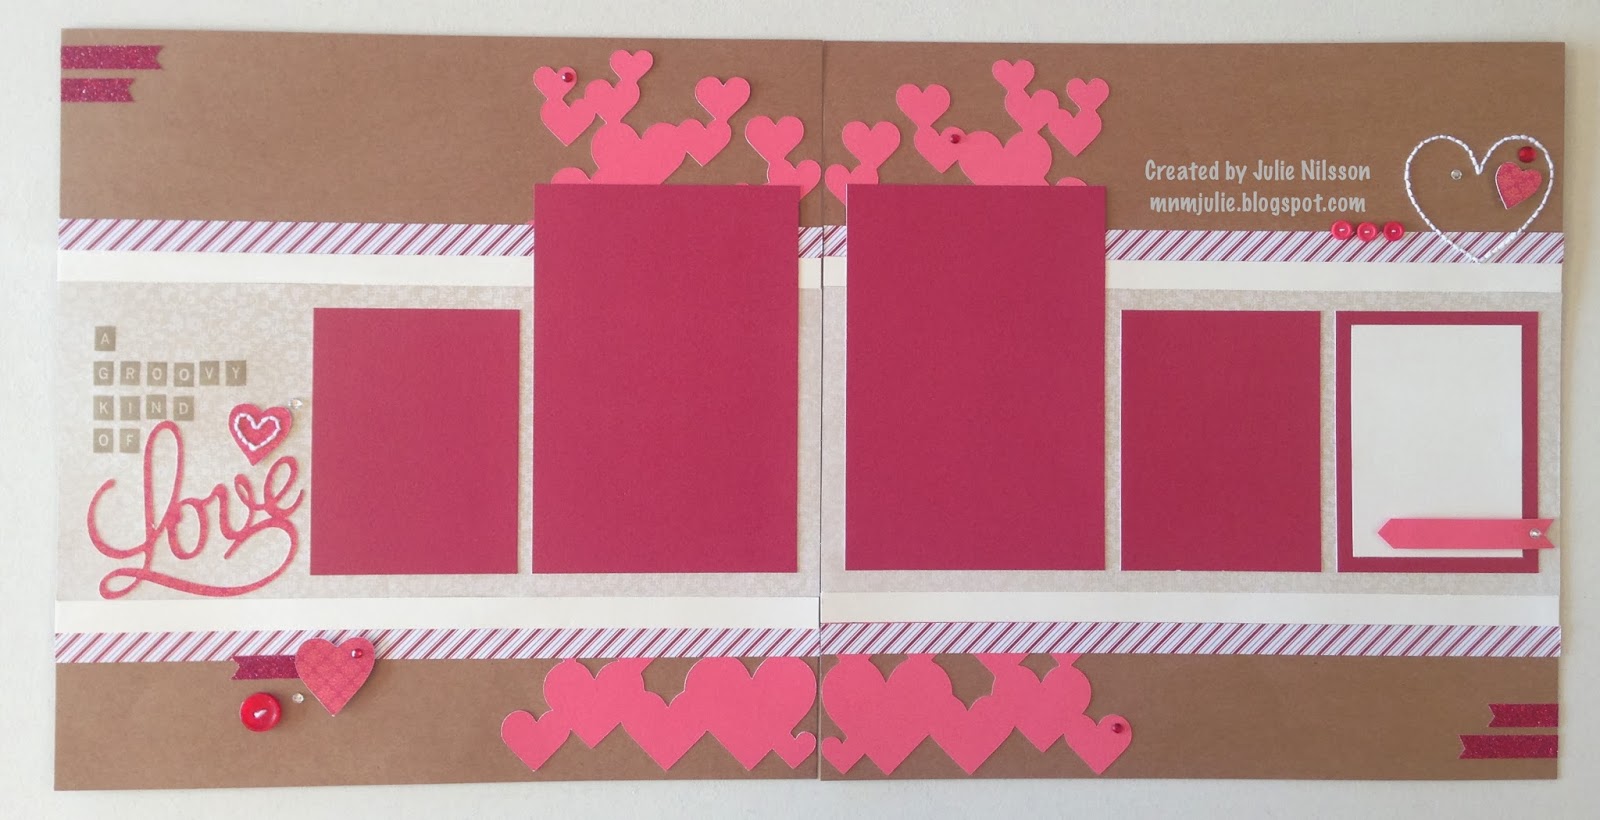
A Groovy Kind of Love Layout

I recently hosted an All Day Crop for my gals and included supplies for a two-page layout in their registration fee.  Valentine's Day is right around the corner, so I created a "LOVE" layout, however, it's generic enough to use for just about any occasion, not just Valentine's Day.  
The layout is Pattern 02 from Make It From Your Heart, Volume 2.  I used Kraft cardstock as the bases for the layout.  I also used a combination of retired B&T papers, Sparkle & Shine, Bliss, and Stella.  Love how all these very different papers come together so nicely.  I rarely create a project without using one or more of the CTMH Cricut cartridges, 
this one is no exception.    


I used the Artbooking cartridge to cut the heart overlay, and the title word "Love".
Heart Overlay - pg48, Overlay, <q>, cut at 11.5" (RealDialSize-RDS)
"Love" - pg61, Title, <f>, cut at 3" (RDS)
Art Philosophy was used to cut hearts too - pg26, shift <Heart1>, cut at 3/4", 1" and 1.25"

 I used Keyboard Alphabet in Desert Sand ink to stamp out the title of the layout.  
The Stitch Guide and Foam Mat came in handy as I pierced the heart shape onto the cardstock and stitched using white Bakers Twine.  The layout also used several coordinating embellishments to accent the pages.  Clear Sparkles, Red Sparkles, buttons, and Red Shimmer Trim

Thursday, November 14, 2013

Sparkle & Shine Gift Tags

This project was created and designed by fellow consultant, Tammy Rusch, for our group swap.  Tammy created a set of gift tags...perfect for those presents under the tree 
or as a handmade gift for a friend.

The packaging that holds all 12 tags is created by using the Sparkle & Shine paper packet, and the Sparkle & Shine WOTG stamp set.

The "Merry and Bright" is on a band that wraps around the gift tag folder, 
it slides off to unveil the tags inside.  Start with an 8-1/2" x 10-3/4" piece of patterned paper or cardstock.  Score paper on 10-3/4" side at 1/2" 3-1/2", 4", 7, 7-1/2, and 10-1/2". Turn paper 90 degrees and score on the 8-1/2" side at 1-1/2" and 6".  Fold to create pockets on long side.  
Use adhesive of choice to seal on the 1/2" sections of the pocket.  
Fold into rectangular box, and secure with band of paper of choice. 

Inside, the tags are stamped using the stamp set from the Season's Tweetings Gift Bag kit.

Great job on your Gift Tag set, Tammy!  Love them!

Wednesday, November 13, 2013

Sparkle & Shine Santa

Need to make a few, very special Christmas cards for those special people in your life?  
This one is just the ticket!


This card was created by fellow consultant, Jodi Frank, for our group swap.  
Products used include:
 Embellishments: Silver Shimmer TrimPearl Opaques
 and Liquid Applique to add the puffy appearance to Santa's hair and pom-pom on his hat.

Great job on your card, Jodi!

Saturday, November 9, 2013

12x12 Sparkle & Shine - get ready to preserve holiday memories

I'm loving the Sparkle & Shine papers and embellishments!  Have you taken advantage of the Holidays from the Heart Special yet?  It's simple...just place an order of $100 or more, and choose a "star" item from the Holiday Gift Guide (retail value of free product ranges from $4.95 to $17.95).  

Here's is my 12x12 scrapbook page I created for our team board swap...I promise to share our groups artwork this weekend.  


I have plans for the opposite page...you'll be seeing it soon!  For this page, I used the Sparkle & Shine paper...can you believe I only used 1 sheet of the B&T paper?  I also used the Sparkle & Shine Washi Tape 3-pack in the holiday gift guide...and it makes it look like I used several different patterned papers.   I also used the Magical Days stamp set for a unique way to add the year (which I got free with my $100 order!) and the Trim the Tree stamp set, and the Sparkle Holiday Shapes.  I added some bling using the Silver Shimmer Trim and the Silver Glitz Glitter Gel...don't you love how it all comes together?  This page is the left page of pattern #11 from the Make It From Your Heart, Volume 2 how to book.  The title (merry & bright) is cut from the Artbooking cartridge in Ruby and White Daisy cardstock...pg. 56, Title, <o>, cut at 10" (NO Real Dial Size).  I shadowed the title cutting a second "merry & bright" in White Daisy Cardstock and just offset the two images. I have found the best adhesive to use with the "welded" titles and the overlays is the Bonding Memories glue pens.  

Friday, November 8, 2013

Artbooking Made Easy - Festive Holiday Mini Album

With the Cricut® Artbooking cartridge from Close To My Heart, your photos will find a cozy home on the pages of a dazzling holiday mini album. Watch the video to gather your own ideas on how to use its themed keys to create merry and bright holiday projects that last.