We show you how to celebrate relationships through discovering your creativity, to preserve and share the moments that matter most. ~CTMH Mission Statement
Showing posts with label Artbooking. Show all posts
Sunday, September 7, 2014
Fun & Sun Layout using Artbooking
Often, I host All Day Crops at my home...12 hours of scrapping fun! This was the layout everyone made for our August 2014 Crop. I figured most everyone would have lots of summer time pictures yet to scrapbook...so the layout seemed appropriate. The photo mat sizes are 4x6 too, so they are ideal for Flip Flaps! Flip flaps are perfect when you want to add additional photos to your layouts. I haven't added them to mine yet, still have photos to develop, but they have been taken. I figure I'll finish up this layout during the cold months of winter...to bring the warmth back!
The title, grass and sun cut outs are images from the fabulous Artbooking Cricut Collection. The cardstock papers unfortunately have recently retired, and no longer able to purchase...however, it's a perfect way to use up your stash! The layout bases are Twilight cardstock, the middle section is Sky cardstock, and the striped pattern paper goes way back to the Tinkerin' paper pack. I also embellished with a few gold sequins. A simple layout, but has the opportunity to hold many, many photos!
Rummage through your stash of papers (if you're like me, you need a 12 step program! LOL) and discover what's new again! Create a layout of your summer time memories!
Saturday, March 22, 2014
The Great Outdoors
Today, I am hosting an All Day Crop (10am-10pm), and here's the layout we created. I pre-cut papers, and provide embellishments for the layout, its all included in their registration fee. This layout uses the new Timberline papers, the title, Great Outdoors (cut at 11" no real dial size) came from page 66 of the Artbooking Cricut cartridge booklet, and I threw in some older embellishments that are no longer available...trying to use up my stash. The stamping is from the Catch You Later stamp set. Colors are Bamboo (bases), Chocolate, Twilight, and Ponderosa Pine.
I want to add photos to this layout so bad!...and sadly, I don't have any outdoor or camping pictures that I haven't already scrapbooked! Guess it's time to take some new ones! Glad Spring and Summer are right around the corner (I have to keep telling myself that, today was cold, snowy and frosty!)
Edit to Post on 5/3/2014:
I found pictures for my layout, and I used Flip Flaps to include more than just the few pictures shown on the layout. Here's what the layout looks like with photos...
Edit to Post on 5/3/2014:
I found pictures for my layout, and I used Flip Flaps to include more than just the few pictures shown on the layout. Here's what the layout looks like with photos...
I love how these pages turned out! The Timberline papers are quickly becoming one of my favorites!
Saturday, March 8, 2014
Artbooking Made Easy: Happy Springtime
With Colorado experiencing lots of spring snow in the last 24 hours
(not that I'm complaining...we definitely need the moisture, and happy for it!),
I thought I would share a Spring time video with you. Afterall, its a perfect day to spend indoors,
creating with your Artbooking Cricut Cartridge.
Jen also explains how the "linked" keys and the Real Dial Size key works
on the Artbooking Cartridge, along with examples in her layouts.
ENJOY!
Successful sizing your images comes with some practice, however, if you ever have questions on how to cut an image, please contact me. I'm happy to help you!
Tuesday, February 25, 2014
Celebrate LIFE layout
Earlier this month, I hosted my new Catalog Celebration for a full house crowd! I have grown to become good friends with so many of my wonderful supporters...you know who you are! And I thank you!!!
I always forget to take pictures during this event...I always think about it before hand, but then get so involved with showing off new products, teaching our creative project, playing BINGO - CTMH style, and giving away prizes...I get lost in all the FUN!
Here's our Make-n-Take for this year. In the past, I have offered a 12x12 page...but this year, I offered a two page layout for just a few dollars more. Each and every one of my guests took the two page offer!
The following products are used in this layout:
I always forget to take pictures during this event...I always think about it before hand, but then get so involved with showing off new products, teaching our creative project, playing BINGO - CTMH style, and giving away prizes...I get lost in all the FUN!
Here's our Make-n-Take for this year. In the past, I have offered a 12x12 page...but this year, I offered a two page layout for just a few dollars more. Each and every one of my guests took the two page offer!
(click on layout for more detail)
I try to introduce as many new products as possible, and still be tasteful, and in a CTMH style!
I love the mix of B&T papers here (Ariana, Jubilee and Balloon Ride).
The following products are used in this layout:
Marquee Uppercase stamp set
This Is Good stamp set (exclusive Hostess Reward)
Doodle Signs stamp set (exclusive Hostess Reward)
Smoothie Striped Washi Tape
Gold Polka Dot Washi Tape
Chocolate Woodgrain Washi Tape
Triangle Stud Durables
Craft Queen Base & Bling Charms
Ink Colors used: Crystal Blue, Smoothie, Honey, Sweet Leaf and Chocolate
Smoothie Striped Washi Tape
Gold Polka Dot Washi Tape
Chocolate Woodgrain Washi Tape
Triangle Stud Durables
Craft Queen Base & Bling Charms
Ink Colors used: Crystal Blue, Smoothie, Honey, Sweet Leaf and Chocolate
Friday, January 24, 2014
Artbooking Made Easy: Elegant Mini Albums
Keeping with the "LOVE" theme from my last few posts...I thought I would share another educational Artbooking video. Of course, the mini albums that Kristine showcases are quite stunning...but make sure you listen all the way to the end, where Kristine shares some tips on how the Artbooking linked keys work.
I still say "practice makes perfect" or at least almost perfect, when it comes to figuring out how the Artbooking images are cut. At first, Artbooking was intimidating, and I was having the hardest time getting the cuts I wanted (that's what scrap paper is for). Now that I've been using it more and more for different projects...the Artbooking cartridge is getting easier and easier to use. Practice does make perfect! Stay in and create something beautiful, that will be treasured for a lifetime...
Wednesday, January 22, 2014
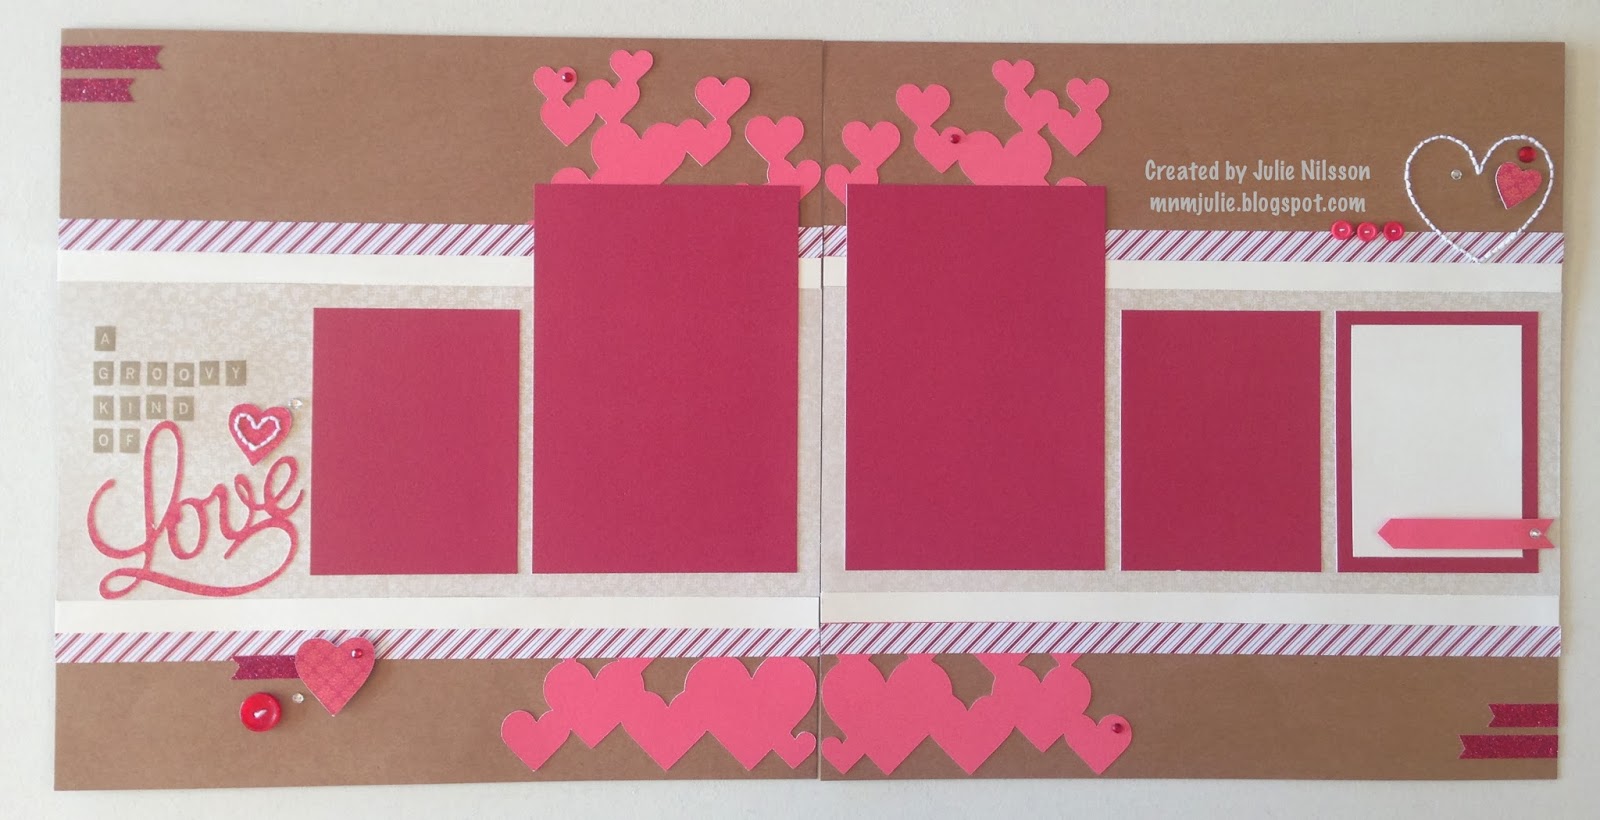
A Groovy Kind of Love Layout
I recently hosted an All Day Crop for my gals and included supplies for a two-page layout in their registration fee. Valentine's Day is right around the corner, so I created a "LOVE" layout, however, it's generic enough to use for just about any occasion, not just Valentine's Day.
I used Keyboard Alphabet in Desert Sand ink to stamp out the title of the layout.
The Stitch Guide and Foam Mat came in handy as I pierced the heart shape onto the cardstock and stitched using white Bakers Twine. The layout also used several coordinating embellishments to accent the pages. Clear Sparkles, Red Sparkles, buttons, and Red Shimmer Trim
The layout is Pattern 02 from Make It From Your Heart, Volume 2. I used Kraft cardstock as the bases for the layout. I also used a combination of retired B&T papers, Sparkle & Shine, Bliss, and Stella. Love how all these very different papers come together so nicely. I rarely create a project without using one or more of the CTMH Cricut cartridges,
this one is no exception.
I used the Artbooking cartridge to cut the heart overlay, and the title word "Love".
Heart Overlay - pg48, Overlay, <q>, cut at 11.5" (RealDialSize-RDS)
"Love" - pg61, Title, <f>, cut at 3" (RDS)
Art Philosophy was used to cut hearts too - pg26, shift <Heart1>, cut at 3/4", 1" and 1.25"
I used Keyboard Alphabet in Desert Sand ink to stamp out the title of the layout.
The Stitch Guide and Foam Mat came in handy as I pierced the heart shape onto the cardstock and stitched using white Bakers Twine. The layout also used several coordinating embellishments to accent the pages. Clear Sparkles, Red Sparkles, buttons, and Red Shimmer Trim
Saturday, November 9, 2013
12x12 Sparkle & Shine - get ready to preserve holiday memories
I'm loving the Sparkle & Shine papers and embellishments! Have you taken advantage of the Holidays from the Heart Special yet? It's simple...just place an order of $100 or more, and choose a "star" item from the Holiday Gift Guide (retail value of free product ranges from $4.95 to $17.95).
Here's is my 12x12 scrapbook page I created for our team board swap...I promise to share our groups artwork this weekend.
I have plans for the opposite page...you'll be seeing it soon! For this page, I used the Sparkle & Shine paper...can you believe I only used 1 sheet of the B&T paper? I also used the Sparkle & Shine Washi Tape 3-pack in the holiday gift guide...and it makes it look like I used several different patterned papers. I also used the Magical Days stamp set for a unique way to add the year (which I got free with my $100 order!) and the Trim the Tree stamp set, and the Sparkle Holiday Shapes. I added some bling using the Silver Shimmer Trim and the Silver Glitz Glitter Gel...don't you love how it all comes together? This page is the left page of pattern #11 from the Make It From Your Heart, Volume 2 how to book. The title (merry & bright) is cut from the Artbooking cartridge in Ruby and White Daisy cardstock...pg. 56, Title, <o>, cut at 10" (NO Real Dial Size). I shadowed the title cutting a second "merry & bright" in White Daisy Cardstock and just offset the two images. I have found the best adhesive to use with the "welded" titles and the overlays is the Bonding Memories glue pens.
Friday, November 8, 2013
Artbooking Made Easy - Festive Holiday Mini Album
With the Cricut® Artbooking cartridge from Close To My Heart, your photos will find a cozy home on the pages of a dazzling holiday mini album. Watch the video to gather your own ideas on how to use its themed keys to create merry and bright holiday projects that last.
Monday, October 14, 2013
Artbooking Made Easy - Halloween Mini Albums
Close To My Heart will bring your projects back to life with the Cricut® Artbooking cartridge. Watch this video to learn how to use it while making your own fun Halloween mini albums.
I haven't personally made this one yet...but it's oh, so cute!
I love the smaller interactive page within the first mini-album.
By now, you know how amazing the Artbooking Cricut cartridge is.
Enjoy!
Please feel free to leave a comment...
Tuesday, October 8, 2013
Autumn Pumpkin Paper Crafting
The weather outside has been cooler the last few days, and I'm enjoying my favorite time of year...AUTUMN! In Colorado, the autumn season doesn't last long enough...I love crisp mornings with afternoon highs in the 60's. Life is good!
My friend Shari shared this idea with me, and I just had to make one for myself.
I've seen something similar posted on Pinterest, in addition to pumpkins, I can see these made with red color cardstock to resemble an apple and give as a small teachers gift too.
Here's how you make them:
take a 5"x6" piece of cardstock and cut into (8) 3/4" x 5" strips. If you want to add the tone on tone stamping, do this before assembling your pumpkin. In this case, I used the flower from the Happy Autumn stamp set, and randomly stamped the 5x6 piece of cardstock before cutting into strips.
Stack the strips together and pierce a hole in the top and bottom of each piece.
Add a brad to the top and the bottom of your strips.
Carefully, flare the pieces out to make a pumpkin shape (this takes some manipulation).
I cut out images from the Cricut cartridges as follows:
Leaf & Vine - Artiste, pg78, 3D Object, shift <GiveThnk>, cut at 3-3/4"
Black Cat - Artbooking, pg70. Icon, shift <C>, cut at 2-1/4" with Real Dial Size ON
Sentiment Bracket - Artiste, pg33, Accent3, <3>, cut at 1-1/4" in Colonial White, then again at 1-1/2" in Black cardstock. Stamp set = Holiday Tags.
I tied the sentiment onto the leaf & vine using Bakers Twine, and added some tan bitty sparkles to the cats eyes.
Monday, October 7, 2013
Artbooking Made Easy: A+ School Layouts
With school in full swing now, hopefully you have time to preserve some of those precious memories.
Close To My Heart's new Cricut® Artbooking collection will give you what you need to score an A+ on back-to-school projects! See how to make your own in this video.
Enjoy!
Thursday, October 3, 2013
Trick or Treat with Artbooking
MY CONFESSION:
When my upline, Michelle Snyder, shared her Halloween layouts...I knew I had to scrap-lift her amazing artwork!
Thanks, Michelle!
Isn't this layout stinkin' cute?
For the layout, I used the 1/2 overlay (corner spiderweb) cut from the Silver Glitter Paper. The spider web overlay can be found on page 70 in the Artbooking booklet, you guessed it, the size dial is set at 11" for the spider web. The title "Trick or Treat" is from page 55 in Artbooking, and this one was set at 6" since this key is designed for a 6" Halloween themed mini album...I might just need to make that too! I added the zip strips from Laughing Lola papers, and matted my photo spaces with Laughing Lola papers too. My base pages are Lagoon, with a piece of 11x11-1/2" Black cardstock on each, leaving a 1/2" border around 3 sides and coming together in the center. Each Sunset square measures 2-1/4". The photo mat on the left page measures 5-3/4"x7-3/4", and the Lagoon cardstock measures 5-1/4"x7-1/4" for a 5x7 photo. The larger of the two photo mats on the right page measures 5-3/4"x5-3/4" and the Lagoon cardstock measures 5-1/4"x5-1/4" for a 5x5 photo. The smaller photo mat measures 4-1/4"x3" with the Lagoon cardstock measuring 3-3/4"x2-1/2" for a wallet size photo.
Growing up, Halloween was one of my favorite holidays...I always enjoyed dressing up in costume and going door to door trick or treating. I have lots of happy memories of Halloween's past. Since moving to the country 16 years ago, and living in Colorado's high country...Halloween is usually our first cold spell of the season.
So...now that you have seen how you can coordinate papers to work for Halloween, I hope you create some special moments this Halloween, and preserve your memories in scrapbooks!
Wednesday, October 2, 2013
Spooky Halloween - Artbooking Made Easy!
This video inspired me to make my own Halloween layout. So many of you mentioned the lack of Halloween papers in this new Autumn/Winter 2013 Idea Book. Well...let me prove you wrong! Although, honestly, I didn't think about it either...but I've seen so many great layouts using Laughing Lola papers with the addition of a few coordinating colors, Sunset, Lagoon, Slate & Whisper.
Have I mentioned how much I LOVE the new Artbooking cartridge! This layout took me no time at all to create! All the images can be found on page 71 of the Artbooking booklet, with the size dial set at 11". All the images are linked to automatically re-size themselves for perfect sizing of photo mats, titles and accent pieces. I did use the Black Glitter Paper for the haunted mansion, and a few of the bats too...this idea was inspired by my upline, Michelle Snyder...her artwork is amazing!
I can't wait to add pictures to this layout! What are your plans for Halloween?
Why not create a layout or two and preserve your holiday memories!
Come back tomorrow...I have another glittery Halloween layout to share!
Monday, September 30, 2013
A Winter Luminaria using ProPlayer
LAST CALL...
If you haven't taken advantage of the National Stamping Month exclusive stamp set trio,
You are My Happy, time is running out fast! HURRY...this special ends TODAY!!!

When you make a purchase of $50 or more, you qualify to get the entire "You Are My Happy" stamp set trio (retail value $47.90) for only $10! This exclusive trio includes a playful alphabet, light-hearted sentiments, and a variety of fun images to use for countless occasions.
The same $50 order also qualifies you to get the September Stamp of the Month for only $5.
JOIN my Mystery Hostess party on my website to take advantage of this amazing special when placing your qualifying order.
Now...are you ready for more Artbooking artwork?
When I first got my hands on the CTMH Autumn/Winter 2013 Idea Book, the first artwork that REALLY caught my eye were the luminaries on page 17. I knew I would have to make one for myself...and sooner than later!
I made these for my 3-D item for our Board Swap.
I used the overlay on page 50 of the Artbooking booklet, cut at 5". I was able to get 6 of the overlays on one sheet of 12x12 paper (each luminary takes 4 overlays, one for each side). Each corner is made up of a strip of cardstock 1" wide and 5" tall, scored down the center at 1/2", and the overlays are attached using Bonding Memories glue. Then decorate to your personal taste. I wanted to show the versatility of the ProPlayer papers, so I embellished my luminary using snowflakes with some bling to reflect the light of the candle inside (it goes without saying...use extreme caution when using a flame next to paper!). A flameless candle (battery) would be ideal to use, however, I do have a small candle in a jar inside.
I used snowflakes from the Artbooking cartridge, cut from Slate and White Daisy cardstock in different sizes. Experiment with different shapes. The sentiments are from one of the stamp sets from the Art Philosophy Cricut Collection.
Saturday, September 28, 2013
Artbooking Made Easy - Getting Started
.
Here is my first layout I created using Artbooking,
it was for the CTMH Pajama Party on Big Picture Classes back in August.
The overlays give the pages so much more dimension and texture. The images on each key are linked, so all the guess work is done for you! No need to wonder what size to cut photo mats, accents, or titles...simple, fast and easy!!!
All the Cricut images on this layout can be found on page 78 of the Artbooking booklet. Just set the size dial at 11" and start cutting! The most difficult aspect is determining which color cardstock to use for each piece.
Close To My Heart's revolutionary Cricut® Artbooking collection will take your papercrafting to a new level! Learn how to use the new collection to turn your themed layouts and mini scrapbooks into beautiful works of art.
Join me each week for the ARTBOOKING MADE EASY series!
Here is my first layout I created using Artbooking,
it was for the CTMH Pajama Party on Big Picture Classes back in August.
The overlays give the pages so much more dimension and texture. The images on each key are linked, so all the guess work is done for you! No need to wonder what size to cut photo mats, accents, or titles...simple, fast and easy!!!
All the Cricut images on this layout can be found on page 78 of the Artbooking booklet. Just set the size dial at 11" and start cutting! The most difficult aspect is determining which color cardstock to use for each piece.
Monday, September 16, 2013
Poster Tidings - September SOM with video!
I finally had a chance to create artwork using the September Stamp of the Month set, Poster Tidings. I was inspired by the beautiful artwork other team members shared at our team training last week.
Fall is my favorite time of year! I love the change in weather (yes, even Colorado's hurricane/monsoon season!), to the colors associated with fall.
I stamped this image in 3 colors, beginning with the lightest color first, as to not contaminate my ink pads. In this case, I used Goldrush ink on the upper 1/3, Autumn Terracotta ink on the middle 1/3, and finished with Barn Red ink on the lower 1/3. I stamped the image on a 2-1/2" x 5" piece of Colonial White cardstock, backed with Barn Red cardstock. The patterned paper comes from the Huntington paper pack. The leaves were cut using the Artbooking Cricut cartridge...and layered. I used New England Ivy cardstock layered with Olive cardstock for the green leaf, and Autumn Terracotta cardstock layered with Goldrush cardstock. The "orange" leaves were cut at 1-3/4" from page 72, using the Icon function key. The "green" leaves were cut at 1-1/4". I also cut a piece of Burlap Ribbon, bunched it up with Natural Bakers twine from the Wooden Mini Medley, tied in a bow. I used the largest brown sparkles as embellishment. The card measures 3-1/2" x 8".
Oh...and the Poster Tidings set also has a Holiday image for December or Winter artwork too! Check out this video on the trendy subway art technique. I figured I owed you one, since I've been missing for a couple weeks...with a good excuse, we were under construction in my studio!
Fall is my favorite time of year! I love the change in weather (yes, even Colorado's hurricane/monsoon season!), to the colors associated with fall.
I stamped this image in 3 colors, beginning with the lightest color first, as to not contaminate my ink pads. In this case, I used Goldrush ink on the upper 1/3, Autumn Terracotta ink on the middle 1/3, and finished with Barn Red ink on the lower 1/3. I stamped the image on a 2-1/2" x 5" piece of Colonial White cardstock, backed with Barn Red cardstock. The patterned paper comes from the Huntington paper pack. The leaves were cut using the Artbooking Cricut cartridge...and layered. I used New England Ivy cardstock layered with Olive cardstock for the green leaf, and Autumn Terracotta cardstock layered with Goldrush cardstock. The "orange" leaves were cut at 1-3/4" from page 72, using the Icon function key. The "green" leaves were cut at 1-1/4". I also cut a piece of Burlap Ribbon, bunched it up with Natural Bakers twine from the Wooden Mini Medley, tied in a bow. I used the largest brown sparkles as embellishment. The card measures 3-1/2" x 8".
Oh...and the Poster Tidings set also has a Holiday image for December or Winter artwork too! Check out this video on the trendy subway art technique. I figured I owed you one, since I've been missing for a couple weeks...with a good excuse, we were under construction in my studio!
Enjoy!
Friday, August 23, 2013
ProPlayer Card - Just Hanging Out
One final card from our team shoebox swap...
Yes, all 6 paper packets from the Autumn/Winter 2013 catalog were showcased in our Shoebox Swap.
WooHoo!
Melanie, one of my newest team members, used the ProPlayer paper pack for her card creation. Mel was so nervous about participating, but she did an amazing job with her card!
So creative, and original too!
Mel used the Artbooking Cricut cartridge to create the frame for her card.
Artbooking: pg64, Photo Mat 1, shift <J>, cut at 4-1/2"
I love how she used the sentiment from the ProPlayer WOTG stamp set "Just HANGING Out", and let it just "hang" out. She used the Slate Twist Ties to tie it to the frame. Using one of the embossed metal badge buttons from the ProPlayer Assortment for the "O"...too cool!
I have lots more artwork to post using this paper pack in the next week or so in our Display Board swap. Watch for it...
So creative, and original too!
Mel used the Artbooking Cricut cartridge to create the frame for her card.
Artbooking: pg64, Photo Mat 1, shift <J>, cut at 4-1/2"
I love how she used the sentiment from the ProPlayer WOTG stamp set "Just HANGING Out", and let it just "hang" out. She used the Slate Twist Ties to tie it to the frame. Using one of the embossed metal badge buttons from the ProPlayer Assortment for the "O"...too cool!
I have lots more artwork to post using this paper pack in the next week or so in our Display Board swap. Watch for it...
Friday, August 16, 2013
Sarita Cards
More cards from our team shoebox swap...
Now...this is the first time in many years of doing this swap, that 2 people used the same stamp set with the same papers...but the look is completely different!
Vicki and Jodi both used the Sarita papers for their cards...
coincidentally they both used the One-Way Borders stamp set.
First up, Vicki's card. Did you notice she didn't use any patterned paper at all for her card? However, Vicki's card still has lots of "texture" with the combination of the images in the Borders stamp set and the addition of the Lagoon Houndstooth Washi Tape and Sarita Textiles in place of ribbon. The sentiment is from one of the exclusive stamp sets included with the Artbooking Cricut collection.
Jodi's card was inspired by the card on page 27 of the new catalog, starts out with a 5x5 card base (cut cardstock 5x10 and fold in half) in Colonial White CS. A 5x5 piece of Sarita B&T Duo paper covers the front of the card base. Jodi used Goldrush, Lagoon and Gypsy inks when stamping just one of the borders multiple times. The "HeLLo" sentiment is from the Artiste cartridge (pg65, Card, shift <B>, cut at 1-1/4" from Outdoor Denim CS). Also used on her card is the Neutral Bakers Twine and the Trinket Wooden shapes (still one of my favs!) with the new Aqua Dots in the center.
I hope you come back to see more!
Monday, August 12, 2013
Announcing the NEW Autumn/Winter 2013 Idea Book
It's FINALLY here...and all the fabulous new products inside too!
Many of you have already received your copy of the new catalog, but if you haven't, it's still not too late! Simply contact me, and we can make arrangements to get you a copy of your very own!
Every catalog release, I have a Catalog Celebration party introducing the new product line. This year was no exception. We play CTMH Bingo, I give away prizes, we create a project or four, enjoy treats, and the best part is drawing for mystery hostesses! It's always a BLAST!
This year, I wanted to show as much new product as possible...so we created 4 cards!
The first card uses the new Huntington papers (love them!) and the new Always Grateful stamp set. The tree was stamped in 2nd generation Olive ink and the sentiment was stamped directly over in Slate. I often forget about this technique...but I love the outcome! The metal flower embellishment is from the new Base & Bling Floral Accents.
The next card is one of my favorites. It uses an overlay from the new Artbooking Cricut Cartridge...AMAZING!!! The Artbooking Cartridge is going to change scrapbooking forever! Ok, back to the card...the overlay is from Artbooking, page 82 (Overlay, <AllBoy>, cut at 4-1/2") from black cardstock. Each strip behind the overlay is cut at 1/2" x 4-1/2" from the new Laughing Lola papers. The middle images were also cut from Artbooking page 82 (Photo Mat 1, shift <Football>) at 3" for the purple, 2-3/4" for the black and 2-1/2" for the white cardstock. The stamped images are from the new All the Details stamp set (so versatile). The base of the card was cut from Lagoon CS at 5"x 10" with top fold. The embellishments are Teal Jewels and Sparkle Flourishes-Small.
This card uses the new Babycakes papers, and I added the Lagoon cardstock to change the feel of the papers. The stamp images are from the new Love This stamp set, and the sentiment is from the new Holiday Tags stamp set (perfect for home-made gift tags!) I love how the poppy flowers really 'pop' off the card! I also used the new Bronze Shimmer Trim for some added bling, and the center of the flowers uses the new ProPlayer Assortment embossed metal badge buttons.
Finally, can you tell I'm excited about the hexagons on Artbooking! This card is overloaded with hexagons! I used the new hexagon B&T Duo paper from ProPlayer, a hexagon image border from Artbooking page 66 (Border, <l>, cut at 5"), the new hexagon irresistables, and the happy birthday sentiment is from the new mini stamps Heartfelt Birthday Wish, and finally accessorized using the new Slate Striped Twist Ties (who would of thunk it!). I stamped the birthday sentiment twice, the top half first in Ruby ink, then without stamping, inked the bottom portion in Outdoor Denim. When you do this technique, just make sure you start with the lightest color first, so you don't contaminate your lighter color stamp pad. There is a great masculine feel to this card. Overall size is 6x6 from Slate Cardstock (cut at 6"x12" and folded in half).
I have SO MUCH new artwork to show you, so make sure you come back soon to check it all out!
Subscribe to:
Posts (Atom)