Monday, June 2, 2014

Celebrate 30!

In honor of our founder and CEO Jeanette Lynton's 30-year anniversary in the stamping and scrapbooking industry, when you place an order totaling $50 during the month of June, you can add your choice of 1 of 6 great gift collections to your order for just $30!  Each collection has an original retail value of at least $50 - some even as high as $65.  
PLUS, each collection is perfectly tailored to fit a variety of interests and styles.  They feature everything from gift bags to ribbons to washi tape to alphabet stickers - and so much more!  Take advantage of these savings and snag your own collection for just $30. 
It may be Jeanette's anniversary - but you get the gift! 

HURRY...these collections are While Supplies Last
Order early to get your most desired collection!


Offer valid June 1-30, 2014 or until supplies are depleted.


Contact me TODAY!

Sunday, May 4, 2014

Free to Be Me Paper Collection for National Scrapbooking Month

Yesterday might have been National Scrapbooking Day, but at Close To My Heart...
we're celebrating all month long!
Don't wait to get your Free to Be Me paper collection...yours for only $5 with a $50 order!
Check out these fabulous papers!!!
Hard to see in the picture, the cardstock sheets have one side with a resist pattern (remember Dream Pop?), and the other side is plain cardstock.  There's printed vellum and B&T Duos too!

BONUS:  As an added bonus to the promotion this month, when your order qualifies for the Free to Be Me paper collection...I will send you (via email) a Free to Be Me Workshop Guide so that you can create these layouts and cards too!


The cards use the May Stamp of the Month, You've Got a Friend...so don't miss out on adding the stamp set to your order...you've already qualified to get it for $5 more when you qualify for the Free to Be Me paper collection!  Love it...it's like a two for one special!  Saving you nearly $20!


 Contact me to place your order, or do so right from my website!  
When your order is submitted, I will send you a PDF including the Free to Be Me Workshop Guide.

To create the layouts and cards as in the workshop, you'll also want to have on hand the following:
4 sheets of 12x12 White Daisy Cardstock
INKS: Bamboo, Cocoa, Lagoon
Stamp sets include:

Saturday, May 3, 2014

You've Got A Friend

HAPPY MAY...can it be true, Spring is finally in the air???

I'm having lots of fun creating with the May Stamp of the Month, 
#S1405 You've Got a Friend.  


During the month of May, when you qualify for the Stamp of the Month set for $5, you will also qualify for the National Scrapbooking Month special, Free to Be Me paper collection, for just $5 more!  I used the Free to Be Me paper collection together with the You've Got a Friend stamp set to create these cards!
Great News!!!  
These cards a just a sampling of the artwork you can create with the exclusive Free to Be Me Workshop.  That's right...when your order qualifies you for the Free to Be Me paper collection, I will send you (via email) a PDF including the Free to Be Me Workshop Guide! You'll get to create these 3 cards and two 2-page layouts...plus have a few scraps for more amazing artwork!  Don't forget to include the May Stamp of the Month in your order!

Want more inspiration?  
Watch this video using the May Stamp of the Month set, You've Got a Friend.

Stop back soon to see more artwork using the Free to Be Me paper packet!
Contact me today to get yours!

Saturday, March 22, 2014

The Great Outdoors


Today, I am hosting an All Day Crop (10am-10pm), and here's the layout we created.  I pre-cut papers, and provide embellishments for the layout, its all included in their registration fee.  This layout uses the new Timberline papers, the title, Great Outdoors (cut at 11" no real dial size) came from page 66 of the Artbooking Cricut cartridge booklet, and I threw in some older embellishments that are no longer available...trying to use up my stash.  The stamping is from the Catch You Later stamp set.  Colors are Bamboo (bases), Chocolate, Twilight, and Ponderosa Pine.

I want to add photos to this layout so bad!...and sadly, I don't have any outdoor or camping pictures that I haven't already scrapbooked!  Guess it's time to take some new ones!  Glad Spring and Summer are right around the corner (I have to keep telling myself that, today was cold, snowy and frosty!)

Edit to Post on 5/3/2014:

I found pictures for my layout, and I used Flip Flaps to include more than just the few pictures shown on the layout.  Here's what the layout looks like with photos...


I love how these pages turned out!  The Timberline papers are quickly becoming one of my favorites!

Sunday, March 9, 2014

Embossing...I'm hooked!


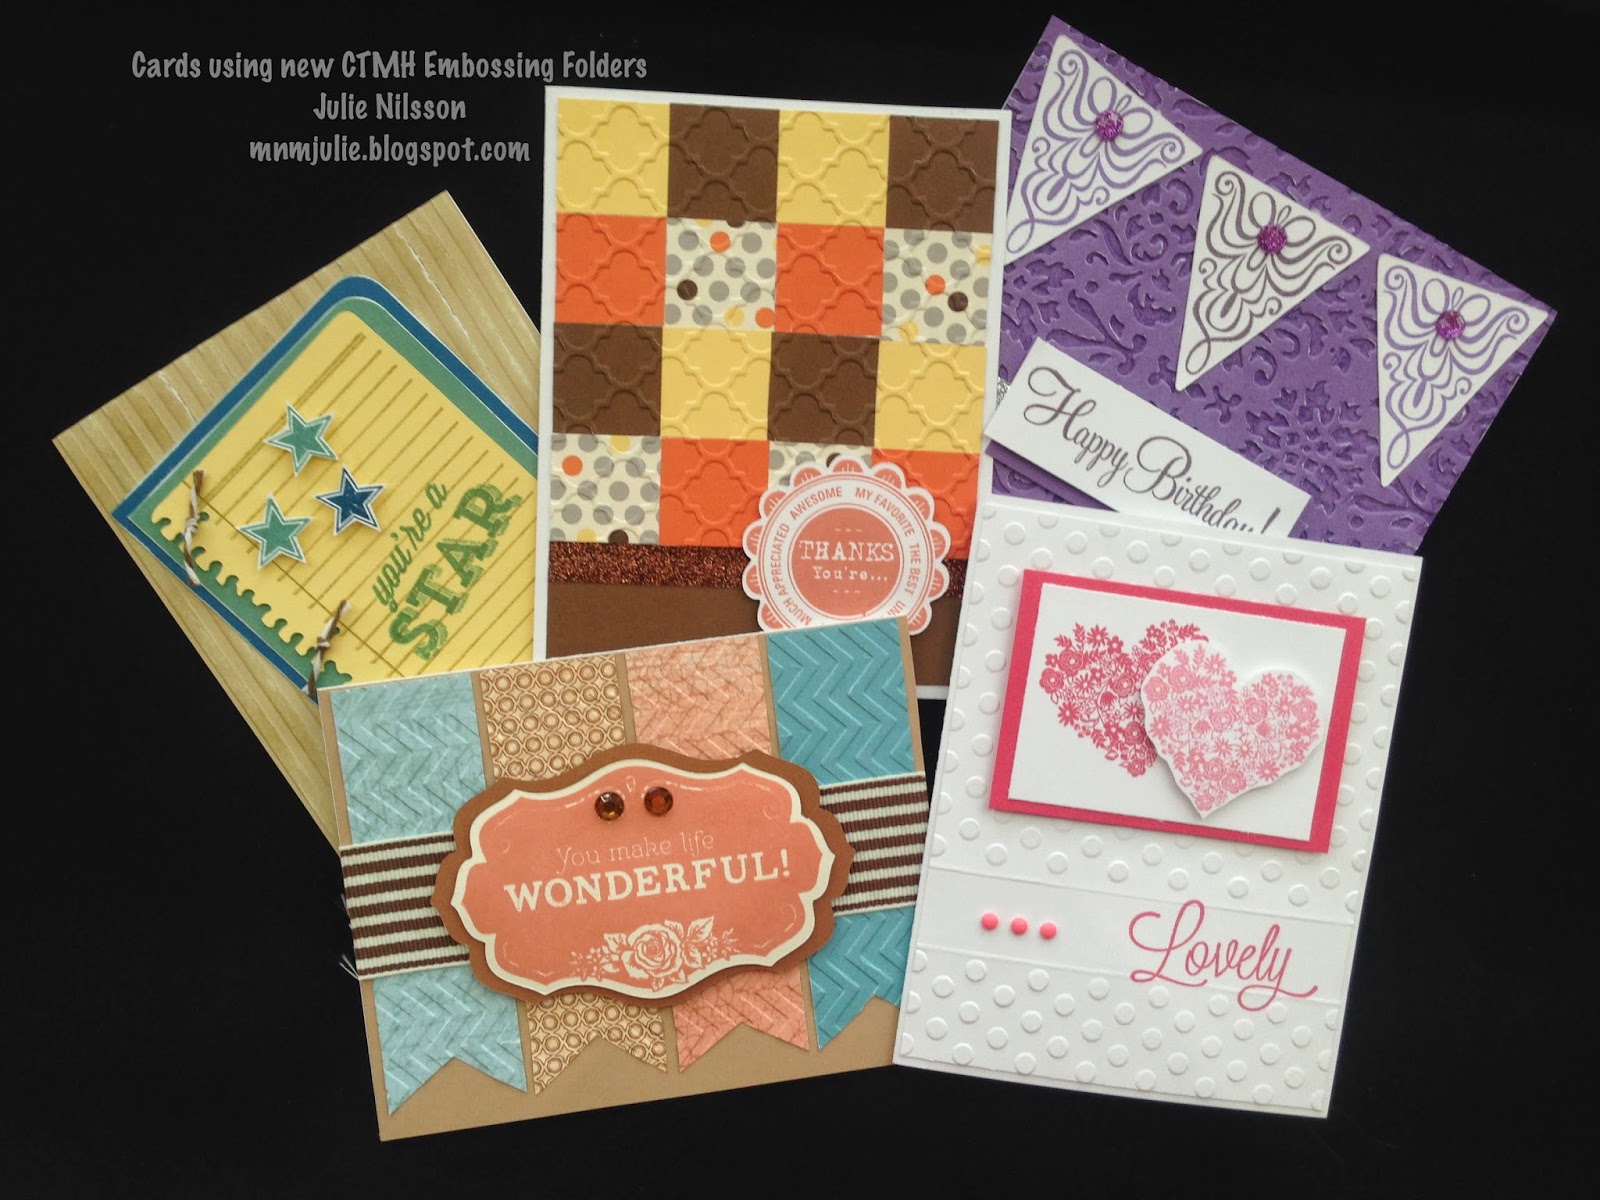
During our team training last week, one of our team members, Randa Wacaster taught us a few techniques using the new CTMH Embossing Folders.  I have been a novice using Embossing Folders until CTMH  introduced our new 5 embossing textures: Dot, Chevron, Quatrefoil, Damask and Stripe.  

After Randa's class, I realize she only got us started...
so many techniques to try, so many different looks.

I know, everyone wants to see a close up of the cards...don't worry, I got your back! LOL

 The "lovely" card obviously uses the DOT Embossing Folder.  Notice the strip that isn't embossed?  It's a perfect spot for your stamped images, and embellishments as shown here.  Just place your card front, not card base (this one is white on white) in the embossing folder about 2/3 of the way, run it through the embossing machine (I have a Cuttlebug), then remove your cardstock, turn your cardstock 180*, line up your impression in the embossing folder leaving about a 1" space from your previous impression, and run it through your machine again.  Then, using your trimmer and a stylist, make a dry embossed line just below and above your impression.  This card uses the stamp set from the Artbooking Cricut Collection, and Flamingo Dots.  Simple, yet elegant.
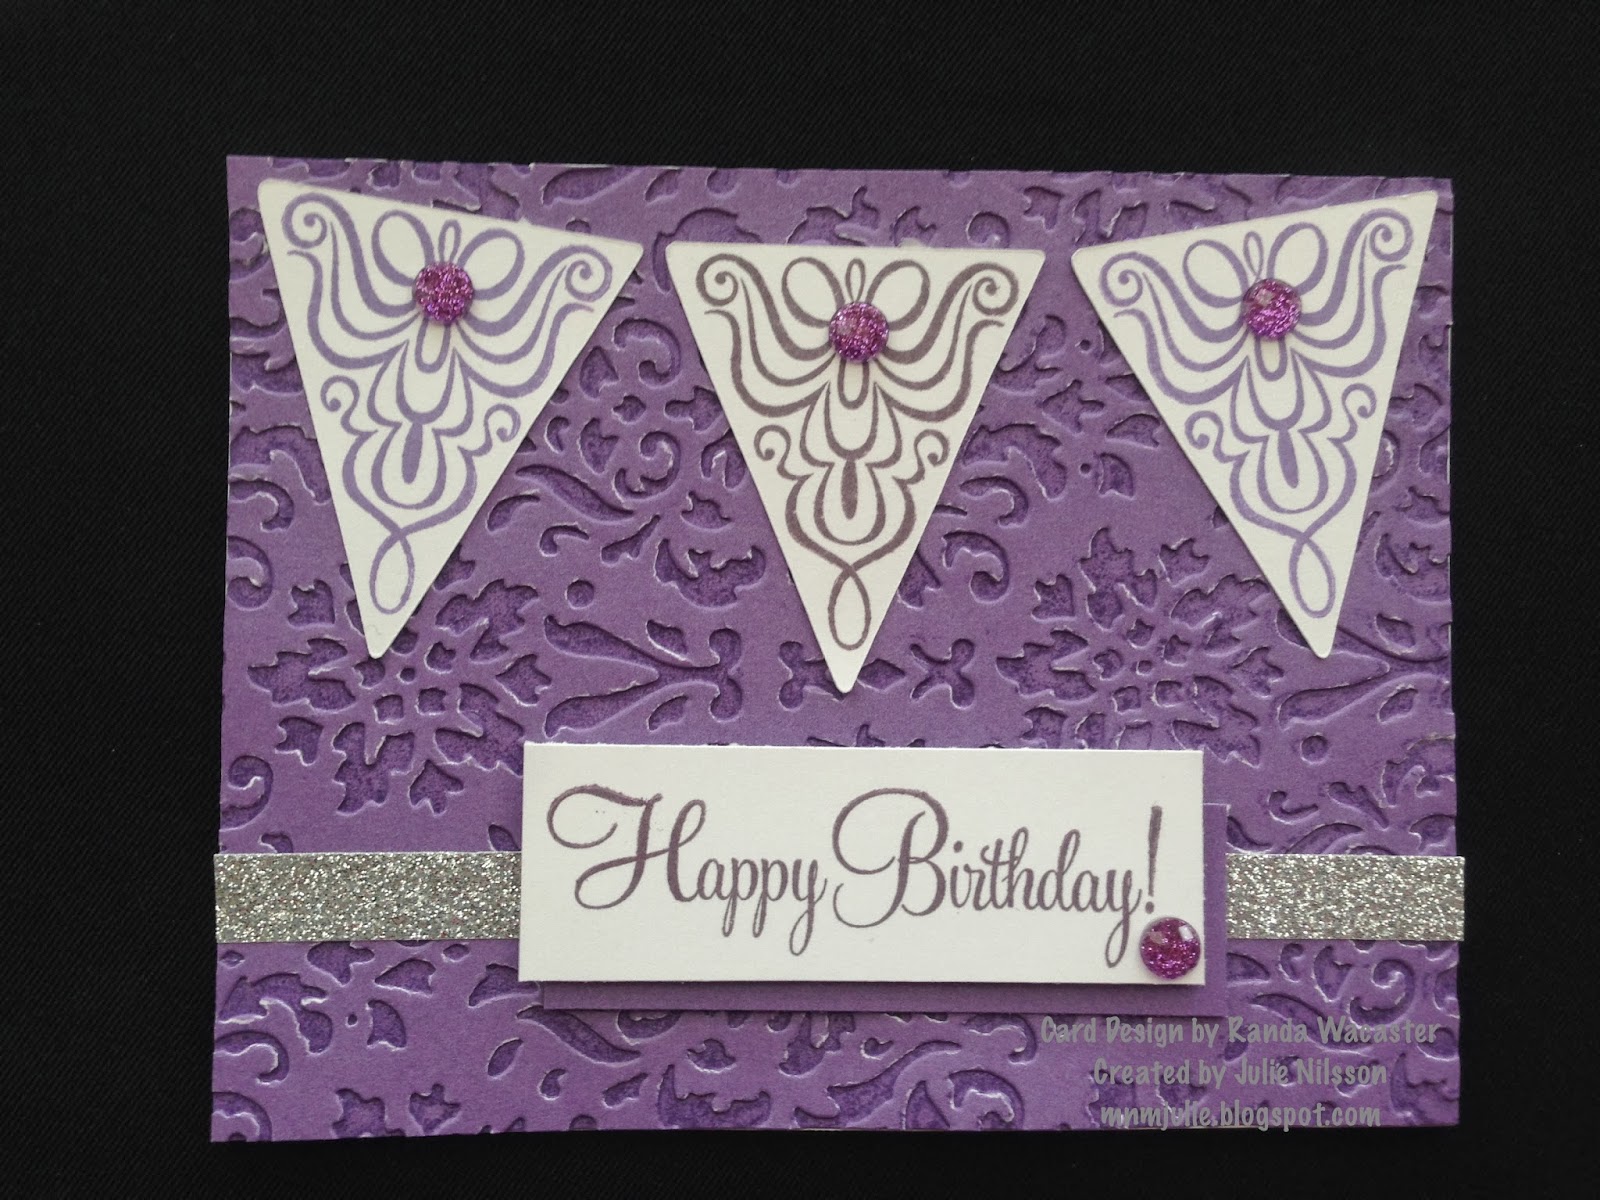

 The "Happy Birthday" card shows a monochromatic texture.  I inked the positive side of the embossing folder with Smokey Plum ink on Gypsy cardstock, and ran my card front through the Cuttlebug embossing machine using the DAMASK embossing folder.  If you ink the negative side of the embossing folder, you get a whole new look...try it!!!  It's so cool!  
This stamp set is one that comes with the Art Philosophy Cricut Collection.  


 The "you're a STAR" card uses the STRIPE embossing folder, and distressed with desert sand ink after it was embossed.  Discovered that you really want to watch the "grain" of your paper, when you cut for embossing.  When I ran the card front through the Cuttlebug against the grain of the paper, the texture looked "cracked", which is a cool technique...but you can avoid the "cracking" if you cut your paper to go along the grain of the paper when you emboss.  The colors used for the card are Bamboo, Pacifica, Juniper and Buttercup.  The stamped images came from the Take Note stamp set with the Artbooking Cricut Collection.  
NOTE: for this project only, the lined notebook paper Cricut image is cut at 3-3/4" not 4" as noted on the stamp carrier sheet.


 The "THANKS" card is a fun and new technique for me, using the Babycakes paper.  It's a great technique to use up some small scraps (if you keep scraps 1x1").  Simply cut enough 1x1" scraps and create your quilt-look on a piece of cardstock (my piece was 4x4), adhere all your squares side by side, and then run through your embossing machine using the QUATREFOIL embossing folder.  We added some Bronze Shimmer Trim and used the sentiment from the Art Philosophy Collection stamp set.
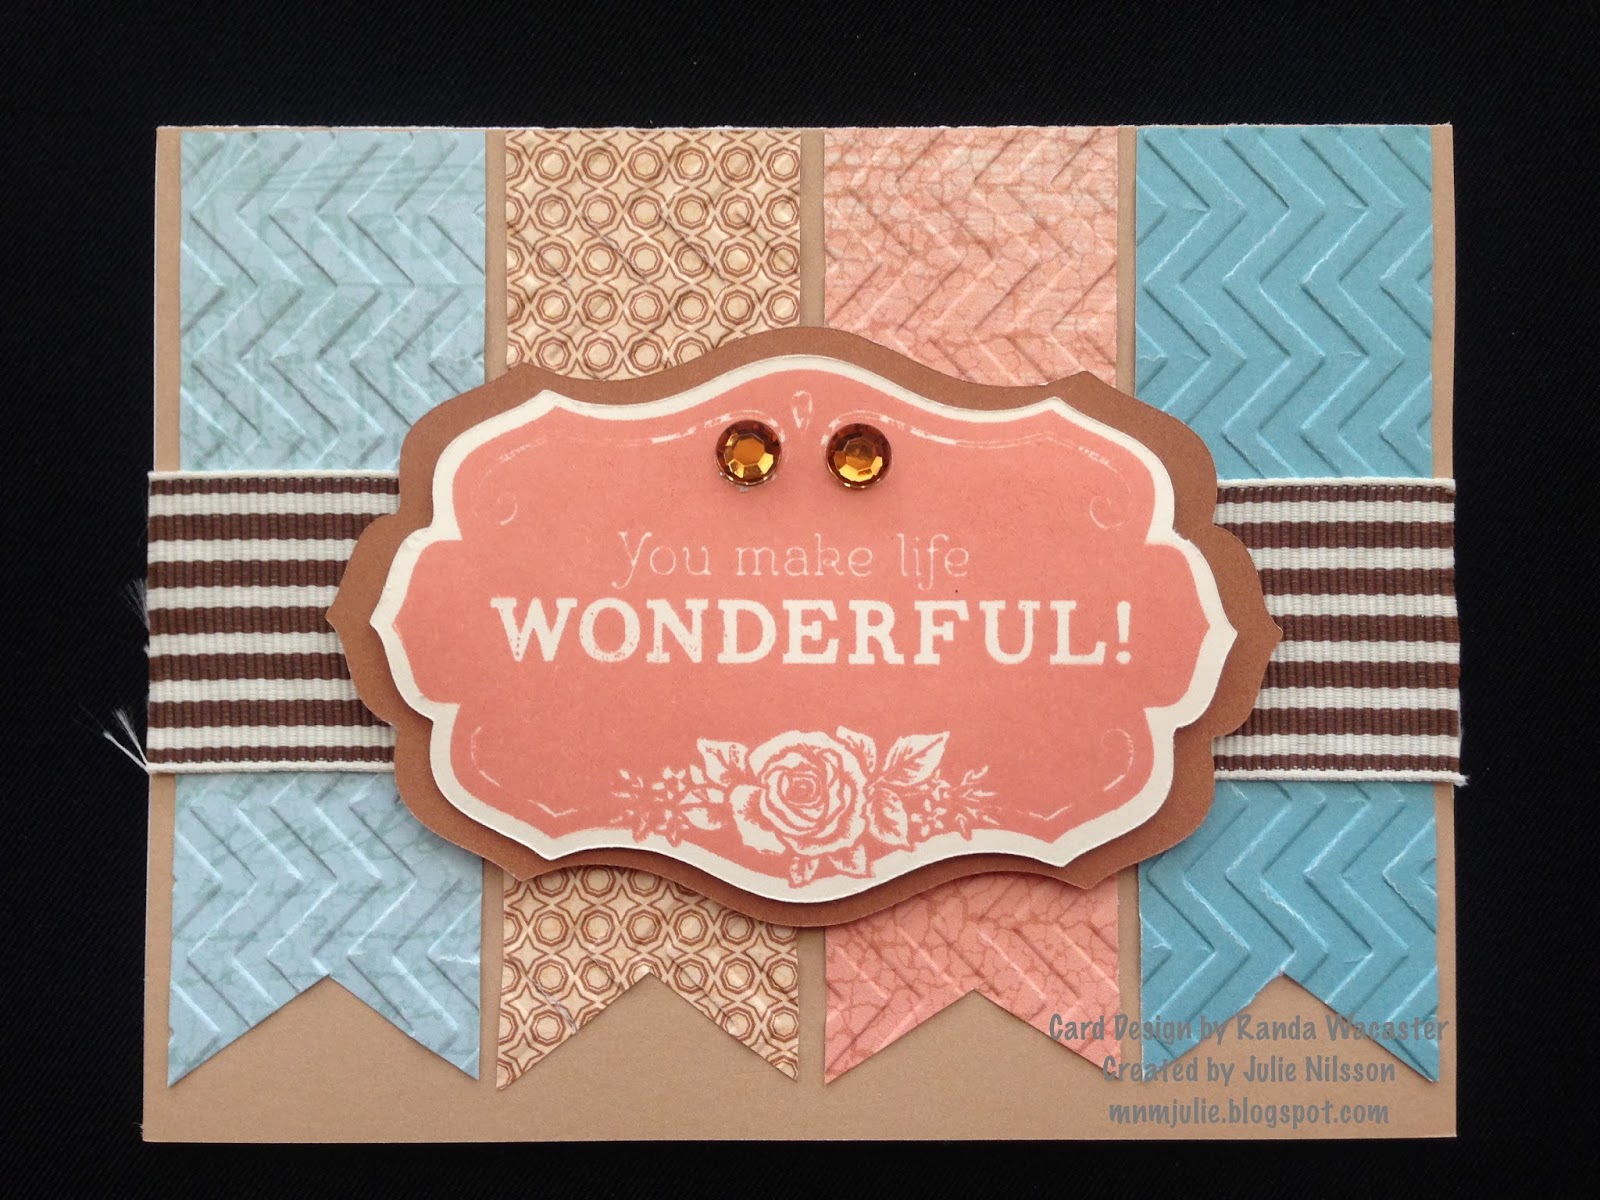

Finally, the "wonderful" banner card uses the CHEVRON embossing folder and the Balloon Ride papers.  This time, we cut the strips of paper, laid the strips of paper onto the embossing folder in the order you want it to show on your card.  Running just the strips of paper through the Cuttlebug, then adhering them to your card front, allows just the banner strips to have the texture, not the whole card. The stamp set is from the Balloon Ride WOTG Scrapbooking kit stamped in Sorbet, and the Chocolate Striped Grosgrain Ribbon (no longer available), and a couple Brown Sparkles for embellishment.

 Randa, thanks for teaching...can't wait to experiment with more techniques!

Embossing quickly adds texture to your paper by slipping it inside one of our 5"x7" (actual size 5-1/4"x7-1/4") clear plastic, patterned embossing folders, then pressing with your embossing machine.  It has been brought to my attention, that the CTMH Embossing Folders do NOT fit the Sizzix Texture Boutique machine (with a 5" opening) without modification.  

Modification is simple (I had a friend share her modification with me) and I'm happy to share her idea with you!  Now she is able to use our Embossing Folders with her Boutique machine. Contact me.

Saturday, March 8, 2014

Artbooking Made Easy: Happy Springtime

With Colorado experiencing lots of spring snow in the last 24 hours 
(not that I'm complaining...we definitely need the moisture, and happy for it!), 
I thought I would share a Spring time video with you.  Afterall, its a perfect day to spend indoors, 
creating with your Artbooking Cricut Cartridge.

Jen also explains how the "linked" keys and the Real Dial Size key works 
on the Artbooking Cartridge, along with examples in her layouts.  
ENJOY!


Successful sizing your images comes with some practice, however, if you ever have questions on how to cut an image, please contact me.  I'm happy to help you!

Friday, March 7, 2014

Happy Place - March 2014 Stamp of the Month

Today, I'm happy to share a beautiful example of what can be created with the 


This card was created by one of our very talented team members, Bertha MacMillan.  
I love all the little details on her card, that don't go unnoticed!
The base of her standard size card is Desert Sand cardstock.  Bertha used the Skylark papers for her masterpiece.  I love the paper piecing she did with the Matryoshka doll (I would have never known what they were called if it wasn't for the Olympics!  I always called them nesting dolls.)  The pinked edge of the Skylark textiles, along with the loops of hemp bakers twine and the Teal Shimmer Trim, makes up a unique cluster.  Don't miss the Lagoon Zipper Lace, and mini clothespin, and Aqua Dots surrounding the sentiment.  It's hard to see, Bertha also stitched the diagonal striped B&T making it appear as pleated ribbon.

Thanks for sharing your talent with us, Bertha!

As a reminder, you can get the March Stamp of the Month set at it's full retail value of $17.95 from March 1-31st, 2014.  Or when you place an order of $50+ in Close To My Heart products, you get the Stamp of the Month set for only $5.  Contact me, or place your order online today!  Only available during the month of March 2014.  Offer expires March 31st, 2014.